

How To Draw A Portrait In Procreate
Procreate is my favorite digital drawing app available for the iPad.
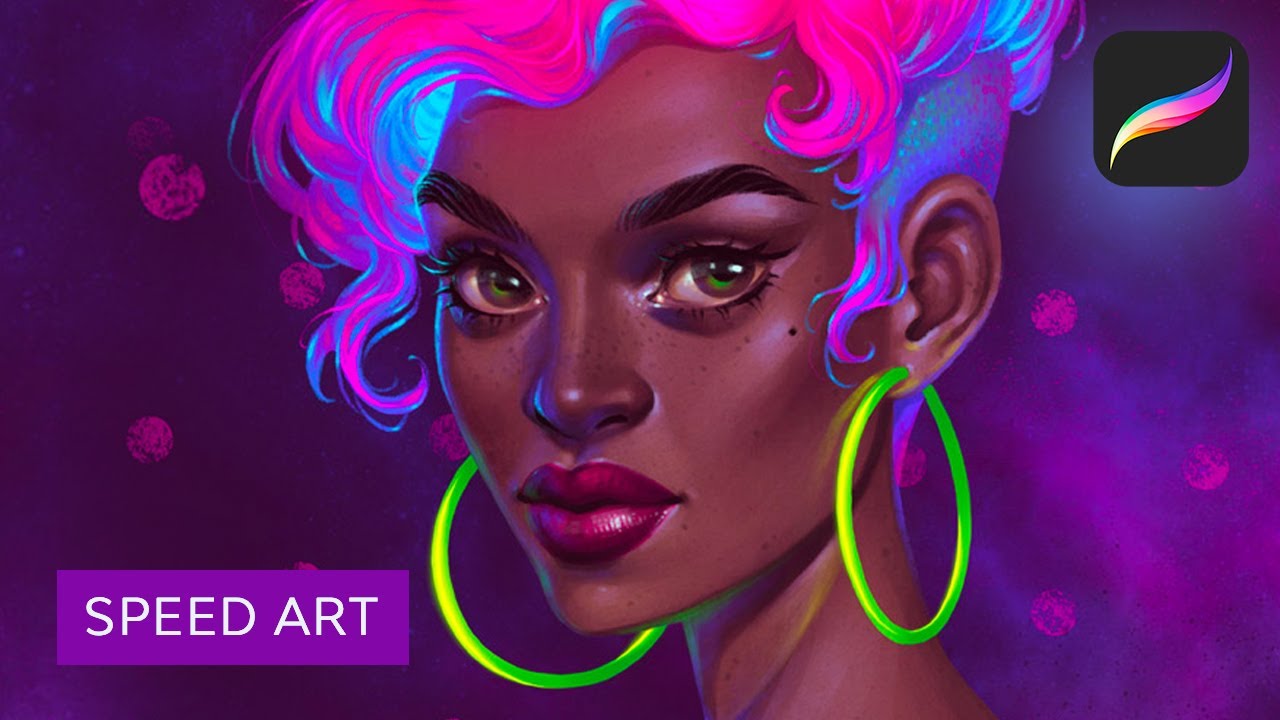
In this tutorial, we'll learn how to create a colorful neon portrait of a beautiful woman in Procreate using different painting techniques. We'll take some inspiration from the retro and glamour styles, and nosotros'll use vibrant neon colors to make it stylish.
Scout me work over on the Envato Tuts+ YouTube aqueduct, where y'all can follow along with this process.
Making your neon portrait and other Procreate digital drawings is a lot easier with the right tools. If you want to add different styles and dimensions to your artwork, download premium Procreate brush sets from Envato Elements. Beauty Brushes is a superlative option for yous, and I included a few more than choices for you at the end of this portrait Procreate tutorial.


Are you all set? Then let's starting time this portrait tutorial for Procreate!
1. How to Brand a Sketch
Footstep one
In this Procreate portrait painting tutorial, I'm using an iPad Pro with the Apple Pencil and the Procreate 4 app.
Showtime, open the application. Tap the (+) icon in the pinnacle-right corner to create a New Canvass. There y'all can select one of the canvases from the list or create a new one.


Tap to Create Custom Size and create a 3500 x 4000 px canvas, RGB, 300 DPI.


Stride 2
Earlier creating a sketch, let's find a proper brush for it. Thankfully, Procreate has a few painting brushes preloaded.
First, open the Brushes tab, tap the Sketching gear up, and select the 6B Pencil.


Permit'southward modify this brush a piddling bit. Tap the 6B Pencil icon, and theSettings of the tool will announced. Choose the General settings and change the Size Limits to ~thirty% Max. Information technology will allow us to have more flexibility in the sketching process.


Pace 3
Permit's begin by drawing a sketch.
We already have two layers by default: one layer with the groundwork color and ane empty layer. Open theLayers panel, tap "Layer 2", and rename it to "sketch".


Step four
Now we can start sketching. Usually I make a combination of basic shapes first, where I'thou trying to search for the silhouette of the character and her features. So I refine the sketch, adding a couple more details to give them a flake more character.
I do a lot of rotating of the canvas in the process. You tin practice information technology besides if you lot like—just use two fingers and rotate your image or size it.
Also, you can change the Size and Opacity of whatever Brush tool by moving upwardly and down the sliders on the left side of the screen.


two. How to Create the Main Shapes
Pace 1
Permit's march on in our neon portrait tutorial for Procreate. First, let's create the Palette of the basic colors.
We have the Colors menu in the top right corner, where we can select the colour.
For the Create a New Palette option, click on the(+) icon, and a new expanse with empty boxes for our new palette will announced. Rename information technology to "neon". This is necessary for our neon paint designs.
At present pick the color and tap on any of the empty boxes, and information technology saves information technology (tap on the boxes to create the colors for your palette, and tap on them to delete any of them).


This mode we'll create our own Palette. Basically, nosotros'll choose brilliant colors for the hair and clothes (place them on the first row), and cold brown colors and nuances of lilac, regal, and lavender for the skin (on the 2nd and third rows).


Step two
Now open the Layers carte du jour, tapNorth on the "sketch" layer, lower the Opacity to 50%, and change the Blending Mode to Multiply.


Step 3
Allow'southward set up a groundwork color past borer the "Groundwork color" layer, which we already take past default. Select a dark royal colour on theColour Cycle.


Step four
It'south time to begin painting with brushes.
Create a New Layer for the peel and drag it under the "sketch" layer.
Showtime, become to Brushes > Airbrushing > Hard Airbrush and pick a dark-brown color from our Palette.


Draw the outlines of the body, using our sketch as a reference. Now we tin can fill information technology with a solid color. Just drag it from the Colors in the top right using your finger, and drop it onto your outline shape. Make sure that your lines are completely closed. Then refine the edges using the Eraser Tool. Cull the Difficult Airbrush tool as an eraser.


Step five
Using this method, depict the hair and clothes on divide layers. Organize them as shown below.


Pace 6
Open the "makeup" layer, and draw eyelashes, eyebrows, nostrils, and the center line of the lips using the 6B Pencil and a dark brown color.


Create a New Layer for the eyes and lips on meridian of the "skin" layer. Fill them with colors using the same brush.


Step 7
Prepare the Opacity of the "sketch" layer to thirty%, making it more than transparent. Information technology'southward still useful to us in the painting process, but should non be so conspicuous at the aforementioned fourth dimension.


3. How to Add together Shadows and Highlights to the Body
Stride i
Let's start by calculation some volume to the body. Tap on the "skin" layer and select Blastoff Lock from the drop-downward list. It will help united states of america to paint within the body shape without crossing this area.


At present select a dark brown color from our Palette and choose the Nikko Rull brush from the Painting gear up.


Start creating soft shadows by making strokes on the shadowy surface area. Modify the stroke Size and Opacity in the process until y'all go the desired shapes. Turn off the "sketch" layer to run into the outcome.


Step 2
This manner, add some deeper shadows using the same brush. Check the result, making the "sketch" layer invisible.


Step three
Let'southward change the colour of the strokes on the "makeup" layer.
Offset select the layer, and so tap the Adjustments icon and choose the Hue, Saturation, and Effulgence from the drop-down list.


Change the colour, making it darker. Move the sliders until yous go the desired result.


Step iv
Now allow's add some blush to the skin.
Create a New Layer on superlative of the "pare" layer get-go. And so tap on the "peel" layer and choose Select from the drop-down list. It will allow us to draw on the "blush" layer just inside the torso shape.
Choose the Soft Brush from the Airbrushing ready, and draw some chroma shapes on the cheeks, nose, and neck. Reduce the Opacity of the layer to twoscore%.


Step v
It's time to add some highlights to the lightened area.
Create a New Layer on pinnacle of the "chroma" layer, and rename it to "highlights". Pick a beige color from our Palette, and paint some highlight strokes, using the same Nikko Rull brush. Reduce the Opacity to xl%.


Step 6
Now create aNew Layer again on top of the "highlights". Draw more than evident strokes, using the same color and castor. Reduce theOpacity to40%as well.


Footstep 7
Once we're happy with the highlights, we tin merge these layers. Tap on the peak layer with highlights and choose Merge Down from the drop-down listing. Or you can have the two layers (one finger on one, and one finger on the other) and squeeze them together.


Step 8
Create a New Layer on pinnacle of the "highlights". We'll add some brilliant highlights to brand the look more expressive. Use the same brush and lilac tint from our Palette. In the end, lower the Opacity to 60%.


At present create a New Layer again and draw some highlights on the cheekbone, on the corner of the optics and lips, on the tip of the olfactory organ, under her eyebrows, and on the forehead. Use the same color and castor with 100% Opacity. Once yous're happy with the result, merge all these layers with highlights, blush and pare into one "skin" layer.


Step 9
Let'south refine the pare a little bit, correcting the roughness of the skin and improving the shape of her face and trunk. Use the Color Picker Button to select the color you lot need. You lot can find this button between the Size andOpacity sliders.


Step 10
Now permit's add some book to the eyes.
Starting time with the white of the centre, adding some brown shadows under the eyelashes. Choose a night chocolate-brown color for the acme of the iris and a light brown color for the underside. Too add some bright dark-green strokes to the iris.
Next, describe a strip on the edge of the eyelid, calculation some shadows and highlights to it.
In the end, add some gloss and twinkles to the white of the center, the iris, and the educatee.


Footstep 11
Now we'll get to work on the lips.
Add the shadows first, using dark shades of cerise colour. And then add some vivid pink strokes and a white gloss to the upper part of the lips. In the end, draw some night dark-brown shadows on the left part of the upper lip and under the lesser lip, equally shown below.


Here's how the face of our adult female looks at this stage.


Step 12
Let's refine the face a little scrap, adding some deeper shadows to the area above and nether the eyes and neck. Too, draw some vivid gloss using the lavander color from our Palette.


Step 13
Once we're happy with the volume of the face and body, let'southward add together a texture to make the skin more natural.
Create a New Layer on pinnacle of the "skin", and rename it "skin texture". Choose the Splatter castor from theSpraypaints ready and selection a brown colour.


Apply Select to the "skin" layer. Using the max size of the brush, describe some strokes, spraying tiny spots on the skin area. Reduce the Opacity to xx%.


At present create a New Layer once again on top of the "skin texture". Describe some freckles and moles, using the same chocolate-brown color and the Nikko Rull brush. Add them randomly to the nose, cheeks, forehead, and shoulders. Reduce the Opacity of the layer to l%.


Step 14
In the end, allow'due south depict some falling shadows from the hairstyle. Create a New Layer for them on height of the "skin". Add some night shadows to the forehead nether the fringe first. Lower the Opacity to 65%. And so, on a New Layer, describe some deep pinkish reflections using the Soft Brush. Reduce the Opacity to 35%.


4. How to Create a Neon Hairstyle
Step i
Let's start forming the hairstyle.
First, brand the "sketch" layer visible. Likewise reduce the Opacity of the "hair 2" layer to 50%.


Now lock in the "hair i" and "hair 2" layers by activating Alpha Lock. Utilize the Soft Brush to draw some bluish strokes at the edges of the main hairstyle shape. As well add some pink to the edges of the hair on the "hair two" layer.


Step 2
Create a New Layer on top of the hair layers. Use the6B Pencil and blue color to describe the lines of the strands of hair, styling separate locks. In the end, turn off the "sketch" layer.


Step iii
Utilize the textured castor Nikko Rull and cyan colour from our Palette to add together some brilliant spots to the inner role of the hairstyle. Then pick a pinkish colour and draw some gentle textured strokes of the highlights.


This style, add a lilac impact to the locks.


Pace 4
Utilise Select to the "hair ii" layer, and create a New Layer on top of it. Choice a cyan color and depict some short, vivid strokes, imitating shaved hair. Besides apply a blue colour to describe the shadows from the upper hair and the area behind the ear.


Step 5
Lock in the "hair lines" layer by activating Blastoff Lock. Employ the same brush with pinkish and bluish colors to shade the hair lines, according to the principle "pink to pink, blue to blueish."
Then turn off Alpha Lock, choose the 6B Pencil, and draw divide sparse blue hairs. In the end, add some gloss to these hairs using cyan.


5. How to Add Book and Texture to the Dress
Step 1
Permit's kickoff with the earrings.
First, choose the Soft Brush from theAirbrushing gear up and a green color. Utilise Alpha L ock to the layers with earrings and draw some green shadows.


Now turn off Alpha Lock. Select the newLightpen brush from theLuminance set, cull a lime green colour from our Palette, and describe some shining strokes on the edges of the earrings.


Footstep two
Now let'southward move to the dress. Make the "sketch" layer visible first. So lock in the "dress" layer by activating Blastoff Lock.
Using the Nikko R ull brush, draw two lime colour strokes to decorate the edges of the apparel. Besides use a pinkish color for the underside of the clothes. Then, using the Soft Brush, add together some lilac tints to the cloth.
Plow off the "sketch" layer. Pick the Nikko Rull brush once again and describe some cyan highlights and purple shadows, forming the creases of the clothes.


Stride three
Now let's add together some texture to the fabric.
Create a New Layer on summit of the "dress" layer. Select the Newsprint brush from the Retro set, and draw some pinkish strokes on the creases and on the area of the shoulders.
Create a New Layer again and draw some green strokes on the highlights area. Then, using the Eraser T ool, make some vertical stripes on superlative of them.
In the end, on a New Layer, describe some lime green and yellow dots on the green texture.


Step 4
Take the Selection Tool, and select the surface area of the dress nosotros want to make a little darker. Then become to Adjustments > Curves, and pull the right slider down a little.


Do the same for the creases, as shown in the screenshot below.


In the end, using the Nikko Rull brush and a dark violet color, draw some vertical stripes deep in the folds.


6. It's Fourth dimension for the Last Touches
Step ane
Let's add some necessary details.
Kickoff, create a New Layer for reflections on top of the "eyes/ lips". Utilize Alpha Lock and Select to the "skin" layer.
Now choice the lilac color and draw some shapes of reflections mostly along the left side of the body. Use the Nikko Rull castor with 60% Opacity for information technology. Draw more saturated strokes on the edges of the body shape.


Stride two
Create a New Layer for the rim lite on superlative of the "makeup", and deselect the "skin" layer.
Pick the cyan colour and the6B Pencil brush to draw brilliant strokes on the left side of the confront. Add some gloss to the eyebrows, eyelashes, and the tip of the olfactory organ likewise.


Step three
In the end, we accept to add some reflections from the earrings.
Create a New Layer for the greenish reflections under the "reflections" layer. Pick the Nikko Rull brush over again and describe some green and xanthous shapes on the cheeks and chin.


seven. How to Create an Abstract Groundwork
This is the last set of steps in our portrait Procreate tutorial. Our neon portrait has come along nicely, so allow's tie it all together with a cool groundwork.
Pace ane
Nosotros already have the bones night imperial colour on our default groundwork layer. Let's add together some texture and a design to make our image more stylish.
Create a New Layer on top of "Background color". Option a new brush,Nebula, from the Luminance prepare and a blue color to add some mistiness to the background. Reduce the Opacity of the layer to lx%.


Create a New Layer on top of the blue nebula and add some pink splashes as well, reducing the Opacity of the layer to 60% likewise.


In the cease, selection a dark principal color from the background and add a splash to the bottom right corner of our sheet. Selection the Eraser T ool with the Soft Pastel castor and make some holes in the blue and pink shapes, diffusing their density.


Step 2
Let'southward create a unproblematic design for the decoration of our background.
Beginning, turn off the "background" and all nebula layers. Create a New Layer on tiptop of them. Pick the Difficult Castor from theAirbrushing gear up and tap on the canvas, making perfect dots. using a grid on the canvas will assist yous to place them at equal distances from each other.


Now let's indistinguishable this row of dots. TapTransform in the top panel, swipe downward with iii fingers, and the menu will appear. Choose Copy + Paste and we'll get these dots on the new layer. Motion them down and to the right. As a upshot, we'll get them in staggered social club. Merge these layers into 1.


Duplicate this layer using the same principle.


Now let's flip our 4 rows horizontally. Just tap Transform in the top panel and choose the showtime icon in the bottom panel. Movement them to the right side.


Pace 3
Let's add some texture to the dots. Apply Select to the layer with the dots. Create a New Layer on top of it and choose a new brush,Burnt Tree, from theCharcoals set.


Pick the pink color from our Palette and apply themax size of the brush to cover our dots with texture. Turn off the get-go layer with blueish dots. Now we have clean, textured pink dots. Reduce the Opacity of the layer to 55%.


Great Piece of work! We're Finished!
I hope you've enjoyed the procedure of this Procreate portrait painting tutorial and the final result meets your expectation!
Good luck, and don't be agape to apply your imagination and create something beautiful!


Best Brush Sets for Procreate From Envato Elements
Creating Procreate digital drawings can be an incredibly satisfying process if yous have the right tools. From Procreate hair brushes to realistic pencil strokes, you lot tin detect something for your project on Envato Elements. Add together an extra dimension to your Procreate portraits and other projects with these useful brushes.
1. Procreate Hair Brush Set (BRUSHSET)


Getting luscious locks and curls to await just right is a lot easier with this Procreate hair brush ready. It comes with multiple dissimilar strand styles that you can utilize in your Procreate digital drawings. You can fifty-fifty create eyebrows and beards with this download. It's i of the best pilus brush sets available for Procreate.
2. Eclectica: Stipple Brushes for Procreate (BRUSHSET)


You'll instantly fall in beloved with the wait of this Procreate brush pack. Information technology was designed to create a stippling consequence that blends multiple retro styles. This packet includes strokes and stipples for a total of eighteen brushes. Eclectica is i of the more unique downloads of Procreate texture brushes. Endeavour information technology for your adjacent Procreate digital drawing.
3. Beauty Brushes for Procreate (BRUSHSET, JPG)
Taking cues from the vintage mode world, the Beauty Brushes Procreate brush prepare is the perfect addition to your personal asset library. In that location are 20 high-quality Procreate texture brushes that y'all tin use for your portraits and illustrations. Add powders, rouges, and different makeup looks in a matter of clicks. If y'all've been looking for Procreate castor sets that are chic and stylish, look no further than this ane.
4. Devbrush for Procreate Bundle (BRUSHSET, BRUSH, PROCREATE, PSD, PNG, JPG)


This is the ultimate Procreate castor pack. In a single download, you'll have more than 150 unique Procreate painting brushes at your disposal. Get useful Procreate texture brushes and styles to complete your next project and to flesh out any ideas you'll take in the future. It'south one of the all-time brush sets for Procreate yous tin can find on Envato Elements.
five. Fabled Pencils for Procreate (BRUSHSET, JPG, PNG)


Accept your Procreate digital drawings lacked a little of that handmade experience? Then you'll want to look at this Procreate brush pack. Information technology features 44 realistic pencil brushes and shaders, likewise as seven bonus newspaper textures. This download is one of the best pencil brush sets for Procreate. It's perfect for sketching and adding some personality to your Procreate portraits.
Even More Useful Procreate Resource
How'd you like learning how to paint a portrait in Procreate? If you enjoyed this tutorial and want to learn and do even more neon paint designs in Procreate, check out these resources, courtesy of Envato Tuts+.

Source: https://design.tutsplus.com/tutorials/how-to-create-a-stylish-neon-portrait-in-procreate--cms-30484
Posted by: burbankcolooter.blogspot.com
0 Response to "How To Draw A Portrait In Procreate"
Post a Comment